


The fourth chapter of Deltarune is a huge tonal shift from the antics of Tenna’s TV Time game show in the previous chapter, but there are still plenty of secrets items and fun gags to discover in between Chapter 4’s main story beats. You can freely explore Kris’ hometown, check on your Castle Town, and explore a brand new Dark World in Deltarune Chapter 4, so there’s a lot of stuff to see.

Just like every other chapter, there’s also a secret boss battle waiting for you near the end of the fourth chapter if you complete a secret puzzle. Beating this secret boss will net you a great new weapon for Susie and some even greater dialogue with some serious implications about the party’s future, so it’s worth checking out if you don’t mind a diversion from the main story. If you want to see everything the chapter has to offer, this 100% walkthrough of Deltarune Chapter 4 is here to help.

Related
Deltarune Chapter 3: 100% Walkthrough
The third chapter of Deltarune centers around Tenna’s TV Time game show, and players can discover several secrets in between rounds.
Going to Church

The chapter opens with Susie and Kris waking up after their adventure in the TV World in the previous chapter. Toriel made pancakes for everyone, but they’re just bait to lure Susie into attending church with the family. Before you leave the house, head upstairs and investigate Kris’ room for some fun interactions with Susie.
When you’re ready to continue, the church service is up next. You can goof around with Susie during the church service, but none of the choices you pick have any lasting consequences. The chapter really starts once you get control of Kris. Your first task is to gather information about the shelter and see if you can figure out the passcode required to get inside.
There are multiple people you can talk to, but you only have to speak to Noelle to continue the main story. Chat everyone up for some fun dialogue, and don’t forget to mix Alphys’ famous 25% red and 75% yellow juice combo at the punch bowls to unlock her dialogue before leaving. When you’re ready to head out, meet Susie and explain the clues you’ve collected.

After church, you’re free to explore the town for as long as you like. As Susie says, it’s the weekend, after all. Noelle’s house is your primary destination, but you should go to the school and jump into the Dark World to check on Ralsei first. There’s not a lot to see in the town other than some fun dialogue with characters like Sans, so start heading to the school to see Ralsei for now.
There’s a fun conversation between Kris and Susie at the local diner that you should definitely check out if you’re not in a hurry.
Castle Town

Back in the Dark World, Ralsei is super stoked to see Kris and Susie again. The Castle Town has grown with new residents depending on how many Darkners you recruited during Chapter 3, so take some time to explore and talk to everyone. Inside the Party Dojo (which has been remodeled with new romantic decor), you can rematch Lanino and Elnina from Chapter 3.
One of Chapter 4’s secret bosses — Motormouth Mike — can be found in the TV building if you’re up for a challenge.
Once you’re ready to move on, head north into the castle and go upstairs to Kris and Susie’s rooms. Ralsei has set up a tea party for the trio, so enjoy! After that, follow Susie to Ralsei’s room. It’s completely empty, but you can find some sweet furniture for him later on in the chapter.

That’s pretty much all there is to see in the Castle Town for now, but make sure to check on the villains in their rooms before you leave. Lancer and Queen are up to new shenanigans, and Tenna has his own room if you saved him in Chapter 3! Tenna even has a small quest for you: finding someone to adopt him. Back in the Light World, you can knock on the door of the lopsided house on the street below Kris’ house to give Tenna a new home. It’s next to Sans grilling if you’re having trouble finding it. You can also bring Tenna to the King in the castle’s dungeon before you leave for a secret cutscene!
Noelle’s House

Noelle’s house is located on the western side of town behind a huge gate. This is where the story kicks into high gear for Chapter 4, so make sure you’re ready before heading inside for the study session.
You can’t do much in Noelle’s house right now, but make sure to check out her bedroom. You can grab a pencil from her homework desk and mess around with the computer to learn more about her. Once the study session begins, Berdly will interrupt and give you a chance to explore without Noelle’s supervision. Go upstairs and enter Dess’ room. The shelter code is hidden in the red guitar, but something will stop you before you can read it.
Soul Stealth

Kris rips the Soul out of their chest and slams it into an empty present in Noelle’s closet, so now it’s time for some stealthy maneuvers through Noelle’s air ducts. Push the big present aside to gain access to the vent. You can’t see much when inside the ducts, but the vents follow the layout of Noelle’s house. If you paid attention to the rooms, you should have a faint idea of where you’re going.
Your main goal is the basement. Avoid Kris at all costs unless you want to end back up in the closet. After stumbling through the ducts, you’ll eventually find a strong air current. If you see that, you’re in the right place. Ride the air wave and exit at the southwest corner to reach the basement. Cut the power in the basement to attract Susie and Noelle.

The pair will trap you and bring you to the living room. Break free and go back to Dess’ room for the code. Kris will lock you in the closet, but you can get Susie and Noelle’s attention by strumming the guitar. Nudge the Santa toys to make noise, forcing Kris to shut them off and giving you a chance to slip by and reach the guitar.
The Dark World

After a tense scene at Noelle’s, all that’s left to do is go back to church. A Dark World has appeared in the church, though, so it’s time for some dungeon crawling. You’ll find yourself in a dark cathedral. Continue forward and you’ll find a piano.
Pianos are a major mechanic for this chapter. They can open locked gates if you play a specific melody, and the notes are hidden in nearby areas. For the first piano, the switches revealing the notes are just below. Play the right notes and the gate will open.
You’ll see some rocky walls that you can climb if you have the right tools, but just ignore those for now. You’ll get climbing gear later on.
A scripted sequence with the Roaring Knight is up next. You can try to dodge its attacks, but eventually the onslaught of projectiles will overwhelm Kris. After a fall, Kris and Susie are reunited with Ralsei. Continue forward to learn more about the prophecy.
At this point, you’ll encounter your first enemies. Guei can be defeated with the Exercism action, which forces them to exercise and makes them Tired so Ralsei can Pacify them.

A dark maze is your next obstacle. Enemies patrol in regular routes through the maze, and the buttons you can walk across will temporarily light up the area. There’s an NPC you can talk to in the southeast part of the maze, but he doesn’t give you anything. Just past the NPC is a hidden room with a part of the prophecy that reads “Jockington grows the beard.”Just grab the Rhapsotea from the chest and move on.
You’ll see a locked door and a green book as you continue onward, but ignore those for now. Next, you’ll meet a pair of Balthizard enemies. You can defeat these by shaking them, but be careful since the Shake action will intensify their attacks.

After the battle, you’ll find yourself in a pitch black maze. You have to use the sound waves from your footsteps to illuminate the path ahead. Hug the walls so you can easily see when new routes are available, and step on the yellow buttons to ring bells and visualize more of the area. There’s a Scarlixir chest in the maze for you to find, too. An ominous red sound wave will stop the party at the northern end of the maze, so turn around and run the way you came to avoid it.
The Old Man

The sound waves weren’t from an enemy after all. It was actually a funny Old Man, and he needs the group’s help to get back to his study. For now, head back the way you came.
The Old Man can help you in battle with special actions like healing and debuffs, so don’t be afraid to choose him. Once you reach the area with the green book from eariler, a cutscene will play and the door will open. Ralsei ends up on the ground, and you can show him some compassion by laying on the ground next to him.

In the next room, there’s another piano puzzle. The group will split up, and the Old Man will ask you some questions. Feel free to answer however you like. Following Susie and Ralsei, you’ll find a bowl of candy. Take one to get a Darker Candy. Take more than one and the bowl will spill. Susie’s not above eating floor food, though. By this point, you should have seen the two halves of the melody for the piano. Play the notes and move on to the next area.
The Old Man’s Study

The library is a hub area for Chapter 4. You can buy healing items from the Old Man, and you can sell items at the fountain up the stairs behind him. He recommends that you visit the East Belltower to open the door to the Dark Fountain, but you’ll need tools from the Northwest Library first.
If you check the fireplace behind the Old Man, you’ll learn about a cool axe that you can obtain during this chapter. This is the first step of unlocking Chapter 4’s secret boss.
The Northwest Library

Head through the open door behind the Old Man to reach the library. One of the books will fly at you and attack, starting a battle with a pair of Bibliox enemies. You can spare these guys with the Proofread action, which requires you to choose the correct spelling of a given word.
Go through the northern door to proceed further into the library. Check the ladder to your right when you walk in and Susie will suggest that you take it for Ralsei’s room. This room has two pianos that control color-coded sliding bookshelves. Use both the blue and green shelves to build a bridge and reach the chest to get the AbsorbAx for Susie. There’s also a secret room on the left side with a MysticBand as well.

When you’re ready to move on, use the blue shelf to reach the northern door. You’ll find yourself in a hallway, so head right to reach another sliding shelf puzzle. Check the couch to secure another piece of furniture for Ralsei, too. This is a slightly tougher puzzle, but the right spots are marked on the floor with white outlines. Before doing that, though, use the shelves to reach the chest at the bottom of the screen. There’s a ReviveMint inside. This puzzle gives you “A conundrum’s last four tones,” which is the second half of the melody needed for the next piano puzzle.
Head back and go down the left side of the hallway to find another darkness maze. There’s a chest with a Scarlixir in the northwest corner, but that’s about it for this area. Find the first half of the piano melody and head back to the door in the middle of the hallway. Play the notes to unlock the gate and continue onward.
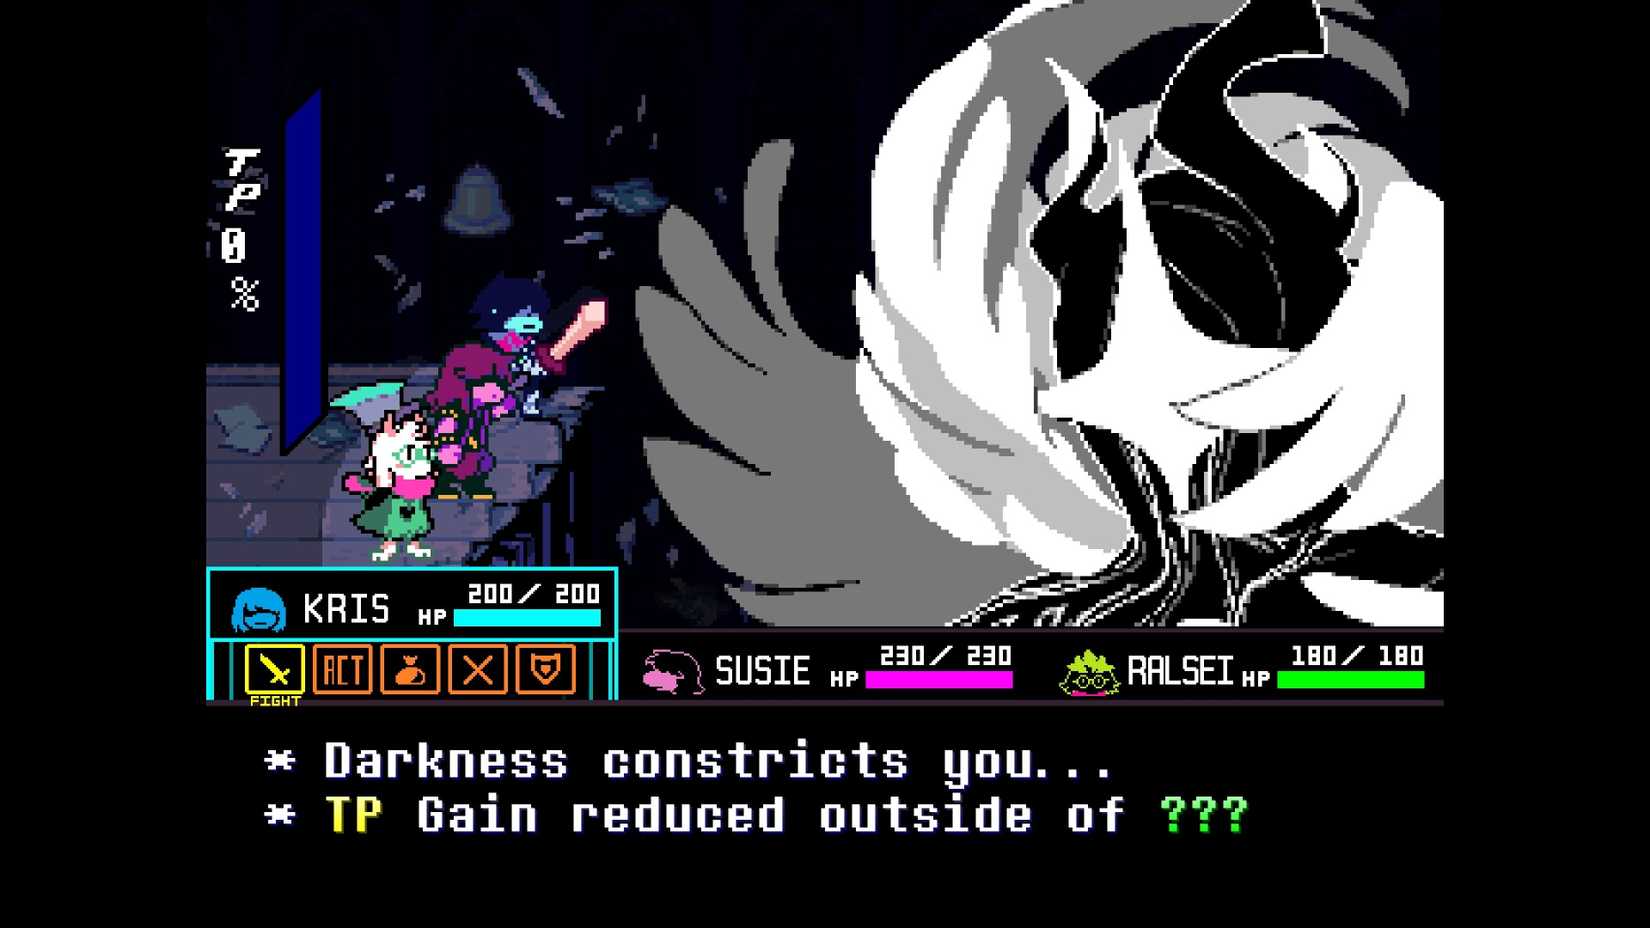
Boss Battle: Jackenstein

One of the chapter’s big bosses is waiting for you in the darkness up ahead, so make sure you’re prepared. Jackenstein is boss with a special mechanic that greatly reduces TP gain outside of treasure collected during his attacks. Jackenstein’s attacks trap you in spooky mazes, and you need to collect the key and reach the exit before he gets you.
You need to be quick during these mazes, otherwise Jackenstein will declare that you’re taking too long and jump into the maze himself to grab you. Once you gain enough TP by collecting treasure, you can use the Unleash action to burn Jackenstein with light. Repeat this three times and you’ll win!
It’s highly recommended to spend a few points of TP on Kris, Susie, and Ralsei’s special actions for this fight. Kris can increase your speed during the maze, Susie increases your treasure-collecting range, and Ralsei provides more ambient light. This guide has more tips for defeating Jackenstein if you’re having trouble!

Jackenstein gives you ClaimbClaws as a reward for beating him, so you can now climb the stacks of books in the library and the rocky pillars from earlier! Climb the bookshelves next to Jackenstein to find a chest with 500 Dark Dollars, and then head back to the Old Man’s study to save and heal up.
Golden Piano Puzzle and Secret Boss

With the ClaimbClaws, you can backtrack and collect music notes to piece together a melody for the library’s golden piano. You can find it by climbing the bookshelves near the entrance to the study. The golden piano’s plaque reads “Melodies three, there be. Two in the southern towers. One where gold strikes water.” You’ll have to revisit old areas to find these, but it’s not too far of a trip.
This golden piano puzzle guide will show you exactly where to find all three parts of the melody. Once you play the melody, a secret room will open up in the study where you can challenge the Hammer of Justice, Chapter 4’s secret boss.
The guide linked above has the locations for all pieces of the golden piano melody, but pay close attention to the donation fountain that mentions passing to the “other side.” That’ll come back up later in the chapter, but be sure to toss some money in for now. If you donate at least $9,999 Dark Dollars, you’ll get the Gold Widow armor as a reward later on! You can also return to the scene of the Jackenstein boss battle for a quick chat with the spooky pumpkin.
Finding the Puzzle Solution

You’ll see a bunch of little red guys as you enter the next screen. The central pillar is the way forward, but open the chest down below to get the Winglade weapon before you climb it.
There are water coolers to the right, so be prepared to battle some Mizzle enemies. You can defeat them with the Embezzle, Nuzzle, and Lullaby actions that make them tired, priming them for Ralsei’s Pacify spell. Continue right to see a missable part of the prophecy about the Queen, and then climb up the central pillar whenever you’re ready to move on.
There’s a long climbing section here, and you’ll need to use the charge jump to gain speed and avoid the falling water. Instead of going all the way to the top right now, though, climb to the right to reach a secret area with another climbing challenge. Those little red guys are having trouble climbing to their queen, but your climbing skills are more than enough to get up there.


The little guys will challenge you when you reach the top, but you can just walk into them. You’ll get a PowerBand from a chest as your reward for this section. From here, return to the normal climbing section and make your way to the door at the top.
The Piano and the Knight

There’s a gigantic piano at the top of the pillar, and its melody will open the door to the Dark Fountain. To find the notes, head right past all the water coolers. Susie will point out a green book and use it to open a door. You can close your eyes with Ralsei and imagine what Susie is doing, or you can choose not to.
You really should close your eyes, though, since there’s a short missable Susie cutscene happening in the other room. With the notes learned, head back to the piano and play the melody. The door in the study will open, so head back there and prepare for the encounter ahead.

Inside, there’s a long climb leading to the Dark Fountain. The Knight will continually launch swords at you while you make your way up, but you can dodge these with well-timed jumps. It’s time to put those climbing skills to the test! After sealing the Dark Fountain, Susie and Kris will return to the Light World. Something’s still wrong, though, so Susie hatches a new plan.
Returning to Church

There’s still smoke coming from a locked door in the church, so you have to search for a way inside. There are multiple missable conversations here. Interact with everything in the left room to get some heartfelt dialogue with Susie and discover Jackenstein’s real-world form, and check out everything in the right room to continue with the main story.
Don’t forget to check the stuff in the foyer, too, particularly the shelf of candles. You’ll be given the opportunity to pray for a character of your choosing. It’s a nice moment. When you’re ready to move on, talk to Susie at the locked door. She’ll get the idea to make another Dark Fountain to ask for the Old Man’s advice, so it’s time for another brief adventure.
The Second Sanctuary

Things immediately seem off in this new Dark World, but there’s no time to worry about that. Head right to encounter some Winglades that you can beat with the Spin action. After seeing a few more pieces of the prophecy, you’ll find yourself in a library with another piano puzzle.
In this Dark World, though, the shelves don’t move when you play the piano. The piano itself moves. Use it to smash through the old bookshelves and access new areas. A chest behind the piano’s starting position has a ReviveMint, and you can head northeast to find Tenna’s part of the prophecy. Breaking the bookshelf in front of the ladder lets you climb up to the open door where you’ll find a circle of statues surrounding an Organikk enemy. Harmonize with them for an easy victory.

Continue east and climb the bookshelf to carry on with the main story. The NPCs here have some interesting dialogue, so be sure to talk to everyone. A short climbing section is up next, and there’s a chest with a Rhapsotea in plain sight. More Organikks block the way, so fight or avoid them. A save point will appear shortly after.
Head south from the save point to find this Dark World’s version of the donation fountain from earlier. The Organikk enemy will be hostile this time, and the chest will have a reward depending on how much money you donated.
When you’re ready to move on, head east and climb up the tower with Susie. The nearby NPC will ask if you’ve heard of hyperlink blocked, but your answer doesn’t matter.

This climbing section changes things up by adding a 3D element into the mix. Avoid the falling water, use the charge jump to gain speed, and grab Susie’s hand for a boost whenever you see her. At the top, Susie will read more of the prophecy and excitedly run off on her own.
Instead of following Susie, head right to find a super long hallway. This is where you’ll find Chapter 4’s egg and moss.
Follow Susie onto the bell path and you’ll encounter Wicabel, another new enemy. Use the Tuning action to spare her. This action reuses the attack animation from Undertale!
The Gallery of Ancient Faces

Up next is a maze of statues. Check them all out for some interesting observations, but watch out for a few hostile Organikks and Wicabels within the maze. If you look closely, you can spot a chest hidden behind a pyramid statue made up of those little red guys from earlier. There are 500 Dark Dollars inside.

Keep exploring with Susie and you’ll reach another climbing section. This time, there’s an ominous cloud following you from below. Use the charge jump to climb faster. Jumping will also defeat enemies. Be sure to help Susie if you see her in trouble. After the climb, you’ll end up in the Old Man’s study once more.

You can interact with the table to buy some Rhapsotea, but head into the room behind the chair to move on. Another darkness maze lies ahead, but some instruments will start to play. Susie will ask if you hear them and where you think they’re coming from, but it’s okay to answer incorrectly.
Boss Battle: “Old Man”

The shadowy figure that Susie believes to be the Old Man will attack, so it’s time for a boss fight. If you did the Hammer of Justice secret boss earlier in the chapter, this’ll be a breeze.
You have to use the axe to block the incoming attack arrows. The edges of the screen will flash to let you know where the arrows will come from, but the Old Man will attack with his hammer every now and then as well. Don’t try to attack (Susie won’t even let you). Just wait it out and Ralsei will eventually come and save the day. Defend and heal until the encounter ends.

With the trio reunited, continue onward up the stairs. There’s an annoying NPC halfway up, but you can ignore him. He’ll come and give you the door code at the top of the stairs.
The Third Sanctuary

You’ll find yourself in front of a giant golden door once you enter the third Dark World. Before you continue forward, you can use the green thing next to the door to return to the Old Man’s study and prepare.
Back at the Old Man’s study, you can head inside the door that originally led to the first Dark Fountain to find a secret encounter. It’s a climbing race against a dog. A DogDollar is waiting for you at the top.

When you’re ready, enter the golden door. The first section inside has books that fly at you, pitting you against Bibliox and Winglade if you’re caught. There’s a conspicuous bookshelf you can walk behind in the northeast corner of the room. It leads to another climbing section. Make your way across the gap to find another part of the prophecy and a chest containing a PrincessRBN.
The next part of the maze brings back the darkness mechanic, but it only activates when you step on the moon panels on the floor. Take a good look at your surroundings before you venture forth. The northwest part of the dark maze hides a chest with a Waferguard inside, too. To continue with the story, head east and enter the door at the end of the maze.

You’ll find a pink piano with some notes floating nearby, but the pianos in this Dark World move on their own. Use the piano as a vehicle and smash through the gate. Follow the linear path ahead to reach the final safe area.
The Point of No Return

Here, there’s a save point and a pink flame that’ll let you return to the previous save point. You’re nearly at the point of no return. A bell is sitting at the bottom of the staircase leading to your objective, and a nearby fountain lets you make Scarlixir and Rhapsotea if you have enough cash.
If you choose to ring out judgment, you can see how many enemies you’ve spared throughout Chapter 4. If you’ve spared everyone, you’ll get a unique cutscene up ahead. After your friends help out, a scripted sequence will play where damage is unavoidable. Just keep walking forward.
Boss Battle: Titan

This is it. The finale of Deltarune Chapter 4. The Knight creates another Dark Fountain and becomes a towering Titan.
The first part of this encounter is another climbing section. Use the charge jump to gain speed and destroy the shadow enemies on your way to the top. The path will constantly crumble around you, so stay vigilant. When you reach the eye at the top, jump into it to deal damage.
After the first climbing section, continue east and choose to jump down whenever you’re ready. Heal up if you took damage! The party will be ambushed by Titan Spawn, and a new mechanic is introduced: purification.

Just like in Jackenstein’s boss battle, you can only earn TP by collecting yellow pellets. Feel free to attack these enemies. They don’t count against a pacifist run. When they attack, use the light surrounding your Soul to destroy them and create yellow TP pellets. Take care to avoid the red enemies, though. Use the Banish action when you have enough TP to claim victory.
One more climbing section is up next, but it’s business as usual. Reach the top and you’ll begin the true battle against the Titan. The purification mechanic is the key to victory here. Use the Soul’s light to banish enemies and gather TP pellets while avoiding red enemies and the Titan’s onslaught of attacks. In addition to shadow orbs, the Titan will also periodically poke its fingers into the arena. They’re easy to destroy, making them an easy source of TP.

Now that Susie is confident in her magical abilities, the DualHeal action is unlocked! It costs quite a bit of TP, but Susie and Ralsei can basically fully heal the entire party with it. The Titan boss battle can drag on for a bit, so take some time to heal if you need it.
At 80% TP, you can use Unleash to bypass the Titan’s defenses and deal some real damage with your next set of attacks. After a few rounds of Unleash, a cutscene will play. The Titan continues to regenerate its health, and your attacks are seemingly futile. With a helping hand from the Old Man, though, you can put the Titan down for good! Use the new DualBuster action to make Susie and the Old Man pelt the Titan with powerful projectiles.
Once a few turns have passed, Susie hatches a plan to defeat the Titan once and for all. Select Susie’s Idea from the ACT menu to end the fight.
Epilogue

After the Titan’s defeat, Susie will rush ahead and see the parts of the prophecy that Ralsei warned her about. Follow them through some scripted sequences and you’ll eventually find yourself back in the Light World.
You’re free to explore the town with Susie, but she keeps insisting that you just go home. Every house is either locked or dead quiet, too, but there are a few interactions you can miss before heading back home.
In the church, check out the door in the top-right corner to find an ominous doorknob. Outside, head west to find a small graveyard. One headstone has a hammer on it. Read it to learn a little more about the Old Man. When you’re ready, go back to Kris’ house to finish the chapter. That’s it! See you in a few years for Deltarune Chapter 5.

Deltarune
- Released
-
October 31, 2018
- ESRB
-
Teen // Language, Suggestive Themes, Mild Blood, Fantasy Violence
- Developer(s)
-
Toby Fox
- Publisher(s)
-
Toby Fox
- Engine
-
gamemaker
